CARDEXCHANGE®
CONTROLLER
Customizing the Controller
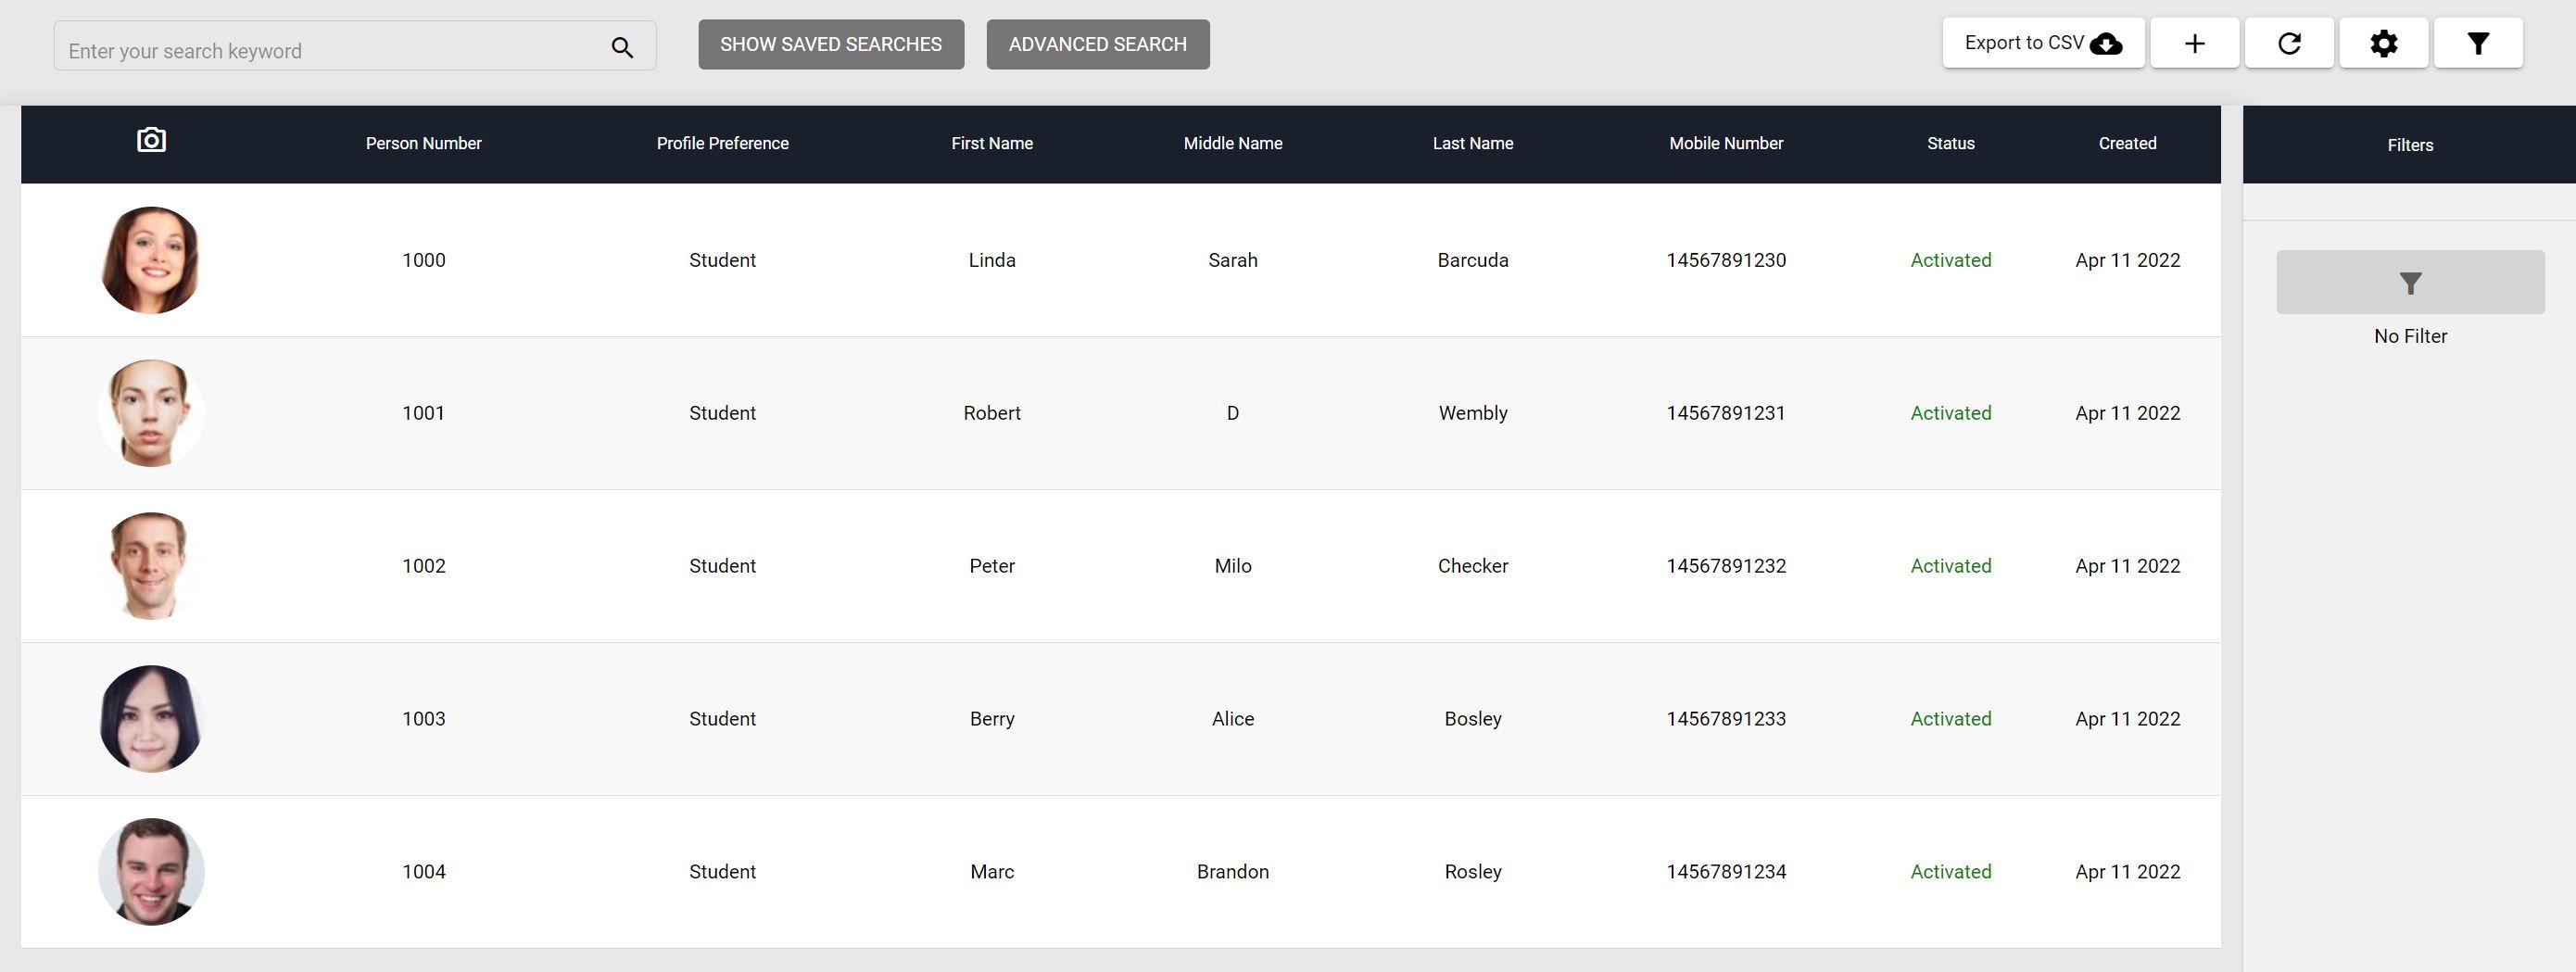
When you first log into Controller, you will be presented with the People screen. Depending on if this is your first time logging on, you may or may not already have People added to your instance.
You can customize what data you would like to see on this People overview screen. By default the fields that are shown are the person's photo, Person Number, First Name, Last Name, Status, and Created Date.
To add or remove fields, you can click on the gear icon button in the top right corner, and go to Table Settings.

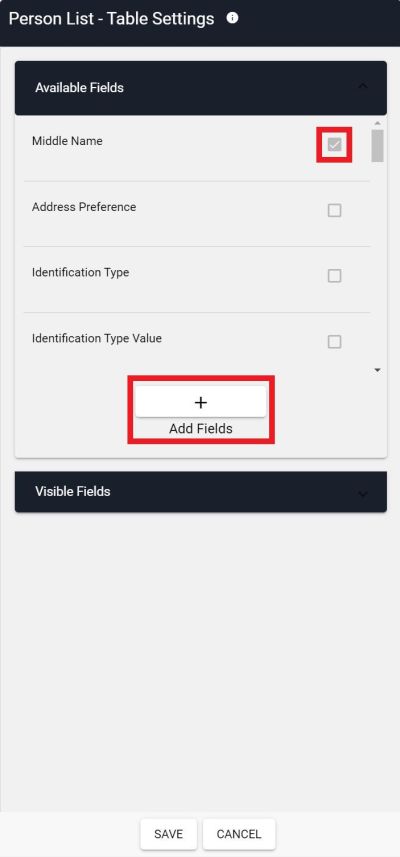
Here you will see a list of available fields, and visible fields. You can expand the one you are looking for and add or remove them to the visible list.
For instance, if you would like to add the Middle Name field to the list of visible fields, select the Available fields then check Middle Name. Click on the Add Fields button at the bottom of the list.

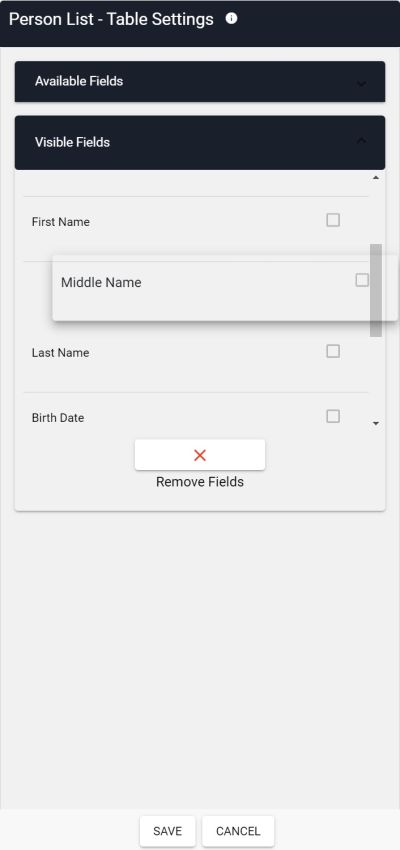
If you want to order the fields differently, then you can click on the Visibile Fields list, click and drag the field you would like to move to its correct location in the list.

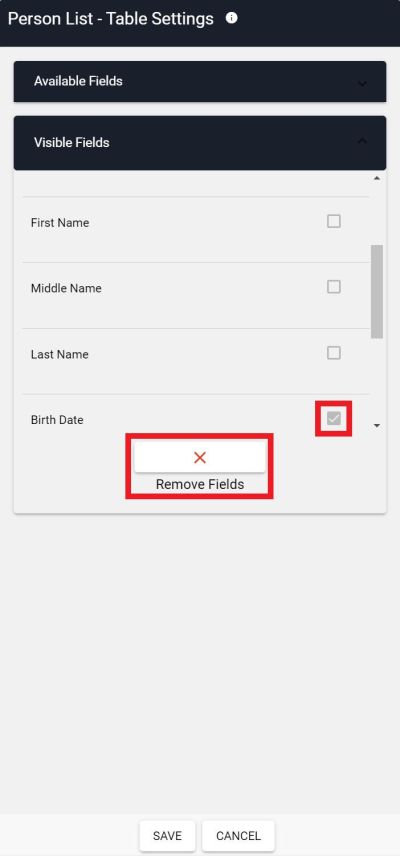
To remove a field from the visible list, then simply check the box to the left of the entry, then click on the Remove Fields button at the bottom.

After you are finished with making changes to the columns, click on Save, and you will be brought back to the People Overview screen. You should now see the field modifications that you made.


US business only within scope

ISO/IEC 27001:2013
United States
2010 Elkins Way, Suite 1122
Brentwood, CA 94513
Monday – Friday
9am – 5pm (EST)
+1 (925) 529 4999
Netherlands
Smallepad 32
3811 MG Amersfoort
Monday – Friday
9am – 5pm (CET)
+31 (0)20 2251 447
