CARDEXCHANGE®
ADMIN CENTER
Menu
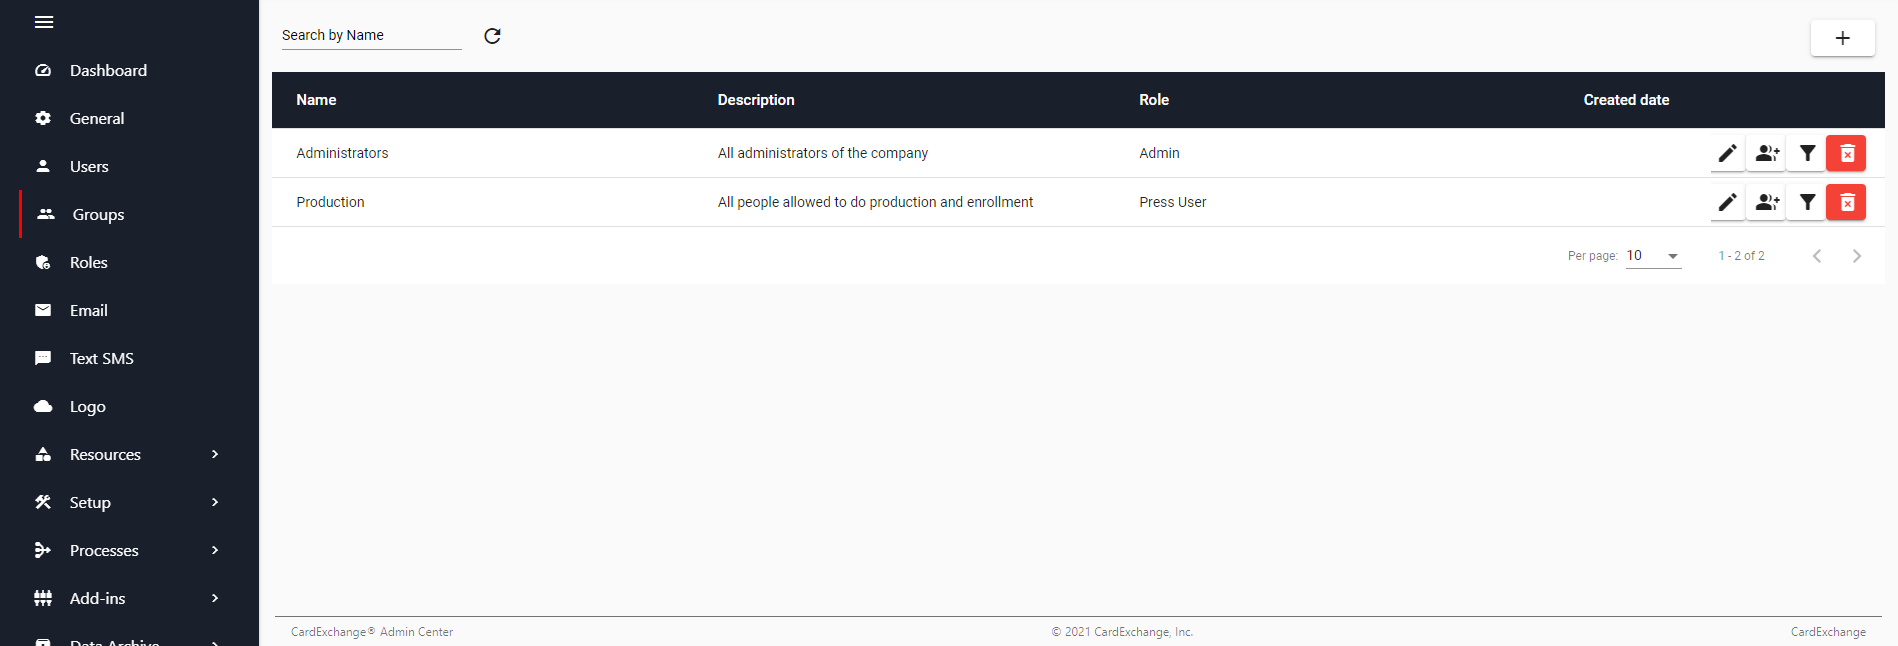
Using Groups
This is standard practice, groups that are defined to indicate Administrators, Production, Photo, etc. These groups can have specific roles, a person added to this group inherits these roles. This needs to be clear for all applications in the Cloud. Not everybody may produce cards or manage the persons in the front end or can approve photos.
In this section you can create groups and assign existing roles to these groups. Click Add a Group to create a new group. The window from the left will open and you can provide a name for the group and a select a role. Additional you can enter a description for the group. Click on Save to store the configuration and return to the group overview.
To add users to the group, select the group and click on Members. Select the available users by clicking the checkbox. When you have a lot of users, you can search for specific users by entering their name or part of their name in the search field. Click on Save to store the selected members to the group and return to the group overview. You can always add or remove users from groups by selecting the group, click on Members and add users by setting the checkbox or remove them from the group by unchecking them.
To make changes, select the group and click on Edit Group. To delete a group, select the group and click on Delete Group. Please note that when groups are used within the management system, these for these assigned users will be removed and they lose access to features and functionality.


US business only within scope

ISO/IEC 27001:2013
United States
2010 Elkins Way, Suite 1122
Brentwood, CA 94513
Monday – Friday
9am – 5pm (EST)
+1 (925) 529 4999
Netherlands
Smallepad 32
3811 MG Amersfoort
Monday – Friday
9am – 5pm (CET)
+31 (0)20 2251 447
