
ContactExchange Plugin
The CardExchange® Producer plug-in framework includes the ContactExchange plugin that allows to read and write to protected/unprotected data and to change the PIN.
- It has 3 Input variables:
- WriteMemory;
- CurrentPIN;
- NewPIN;
- It has 2 Output variables:
- ReadMemory;
- ReadProtectedMemory;
Plug-ins are only available in the CardExchange ® Producer Business and Enterprise editions.
Description
The ContactExchange Plugin supports the following cardTypes SLE4442, SLE4432, SLE5542, SLE4428, SLE5528.
To use the different cardTypes is needed to access to the ContactExchange.ini file open it with the notepad and change the InUse= to the cardType that the customer wants to use.
On the same ContactExchange.ini file you can change the setting to access to protected data, please note that from default it’s not accessible since changing it in a wrong way will froze the card forever.
To do any operation on the card such as read or write is needed to supply the PIN, the manufacturers PIN should be 3bytes - FF FF FF or 2bytes - FF FF depending on the cardType or manufacturer.
When changing the PIN to a new one please note that it must not be more than 3 bytes for instance it can be AA AA AA or 01 02 03 or if the PIN only has 2 bytes it must have the same size AA AA or 01 02.
To access to ProtectedMemory for read or write, please change the Setting on the ContactExchange.ini to true/True.
Example
To illustrate how ContactExchange plug-in work, we will create a card definition with 2 manual entries.
To start, create a new card layout with a text object linked to a variable called "OutputVariable1" and a second text object linked to a variable called "OutputVariable2".
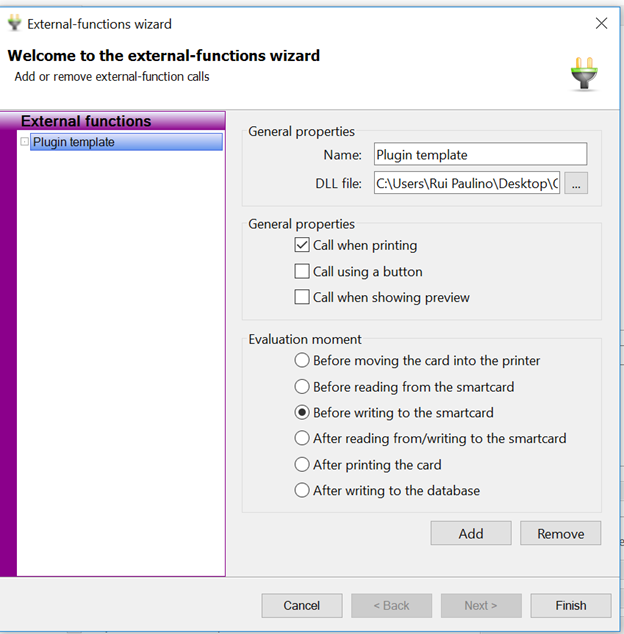
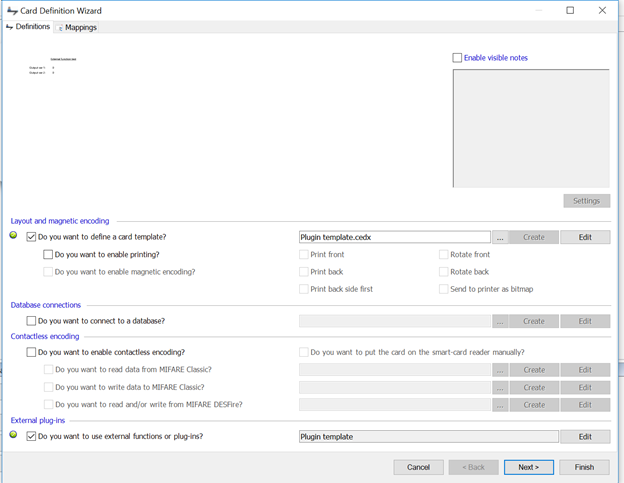
1. Select "Do you want to use external functions or plug-ins" in the card-definition wizard and click the Edit button to configure the plug-in.
2. Add a plug-in called "Plugin Template" and browse for the ContactExchange the DLL-file. Then click Next.\
3. After that please configure the InputVariable to send to the plugin for the Input Variables (WriteMemory, CurrentPIN; NewPIN).
WriteMemory will be the Data written;
CurrentPIN to do any operation;
NewPIN if you want to change the PIN of the card.
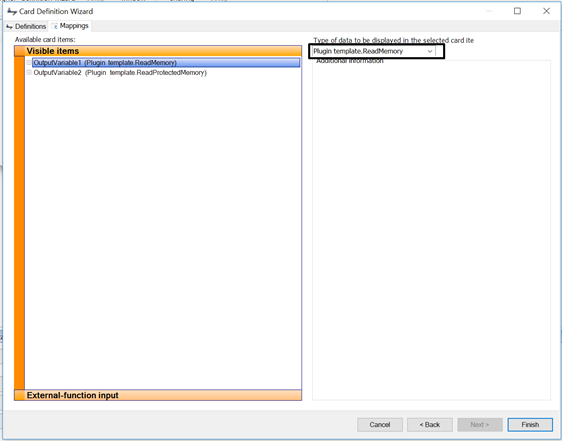
4. Next, select the Visible items and choose which is the data that you want to save on the OutputVariables (ReadMemory, ReadProtectedMemory).
Please note that ReadProtectedMemory only will display the data if you have the ContactExchange.ini file with AccessToProtectedData=true.
5. Click Next to go to the mappings window and map the visible item called "ManualText" to the plug-in output "ManualText.Result". Then map the plug-in input "ManualText.Definition" to "Enter manually".
6. Select the External Function Input items tab and map the storage Item/variable/database column to the item "Template.WriteMemory", "Template.CurrentPIN","Template.NewPIN".
If nothing is mapped the plugin will take it’s defaults (NoWriteaction, FFFFF, Doesn’t change the PIN).
7. Map the item/storage item to save the read data and click on finish.
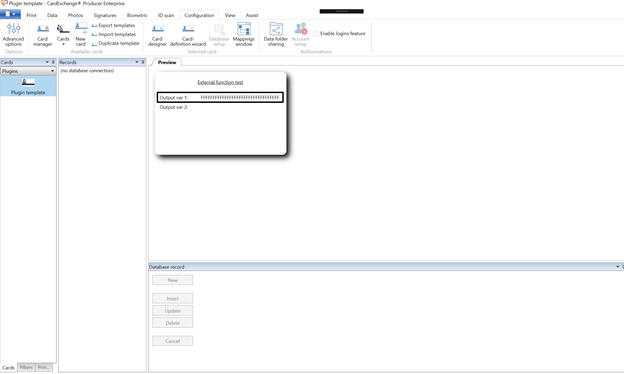
8. Print the card. You will now see that the manual entry on the printed card.


ISO/IEC 27001:2013