
Using CardExchange® Producer with CardExchange® Cloud
First you need to ensure that your CardExchange.Gateway.exe.config file is set up correctly.
In Windows Explorer, go to the Program Installation directory. By default this is:
C:\Program Files (x86)\CardExchange Solutions\CardExchange Gateway\
Now find the CardExchange.Gateway.exe.config file, and drag it on to the CardExchange.Config.exe file.

This will open the file in the Configuration program.
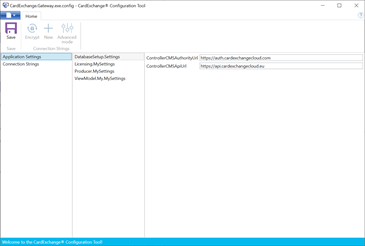
Under the DatabaseSetup.Settings, make sure that the following URLs are correct:
ControllerCMSAuthorityUrl: https://auth.cardexchangecloud.com
ControllerCMSApiUrl: This should be the correct value for your instance region:
US: https://api.cardexchangecloud.com/
Canada: https://apicanada.cardexchangecloud.com/
Europe: https://api.cardexchangecloud.eu/
UK:https://api.cardexchangecloud.co.uk/
Australia: https://api.cardezecloud.com.au/
Now that is configured, open up Producer.
Open your Card Design that you want to link to the CardExchange® Cloud database.
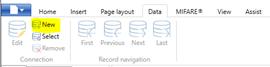
Click on the Data tab at the top, and click on New
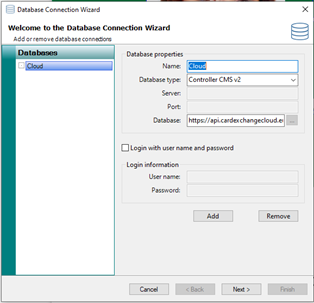
Set a name for the connection, choose Controller CMS v2 as the Database type.
In the Database field, choose the correct regional URL for your instance:
US: https://api.cardexchangecloud.com/
Canada: https://apicanada.cardexchangecloud.com/
Europe: https://api.cardexchangecloud.eu/
UK:https://api.cardexchangecloud.co.uk/
Australia: https://api.cardezecloud.com.au/
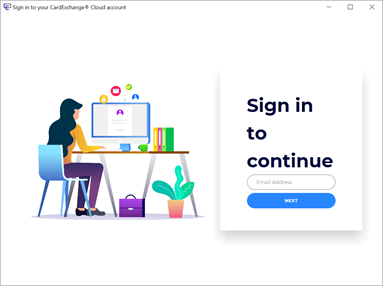
When you click on the Next button, you will need to sign in to your Cloud instance.
NOTE: The user you are signing in with needs to be assigned a Press role from the Admin Center.
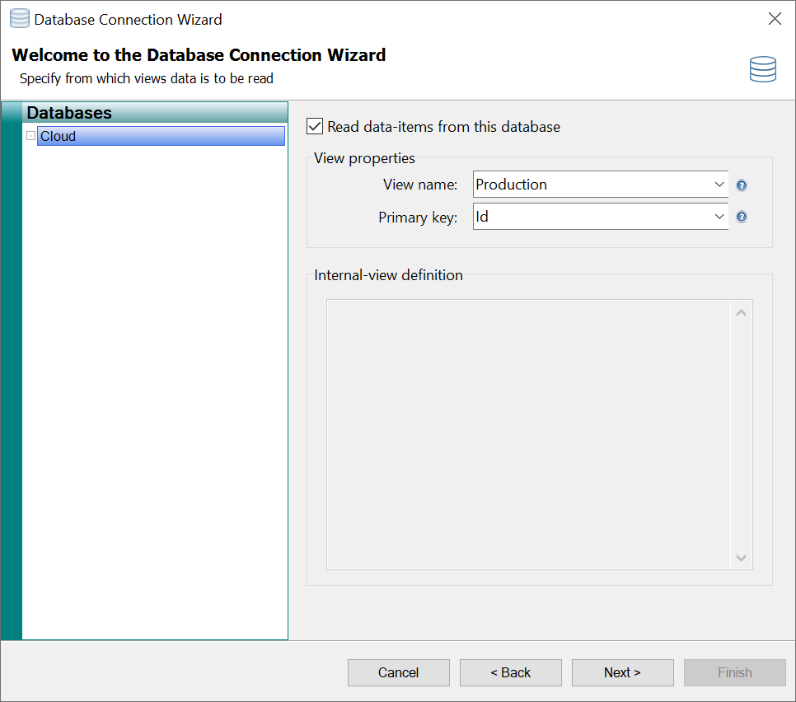
After you have signed in, you will need to select the view to read data from. This should be set to the Production view, with the primary key as Id.
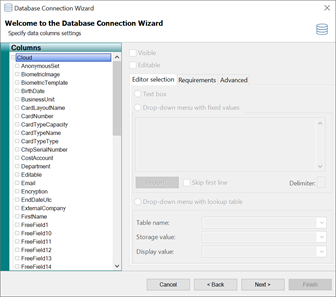
Next check the fields you would like to display in the Records List pane in the Main Interface:

CardExchange® Producer should not be used to add new records, or update the existing data from Controller. Leave ‘Allow editing database records’ unchecked, and click on next.
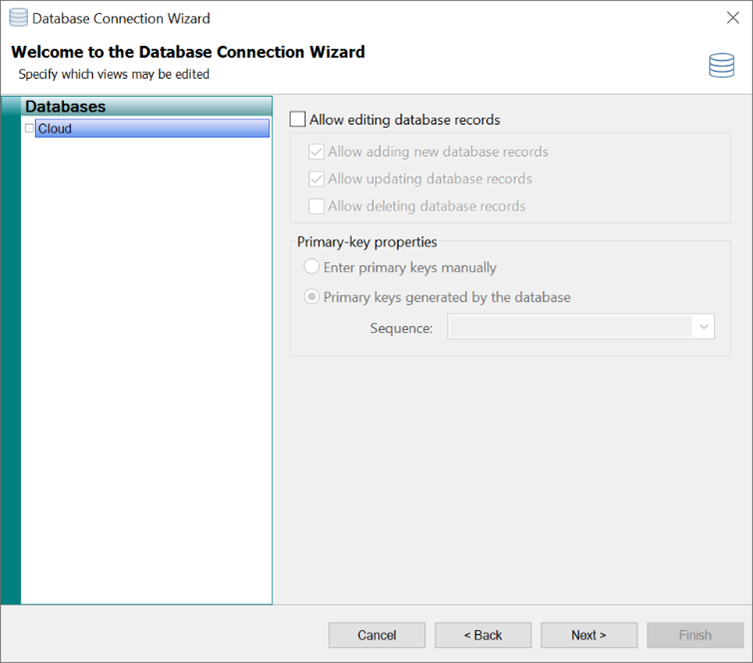
Likewise, you do not need to make any changes to this next screen, as you will not be able to Add or Update records from Producer
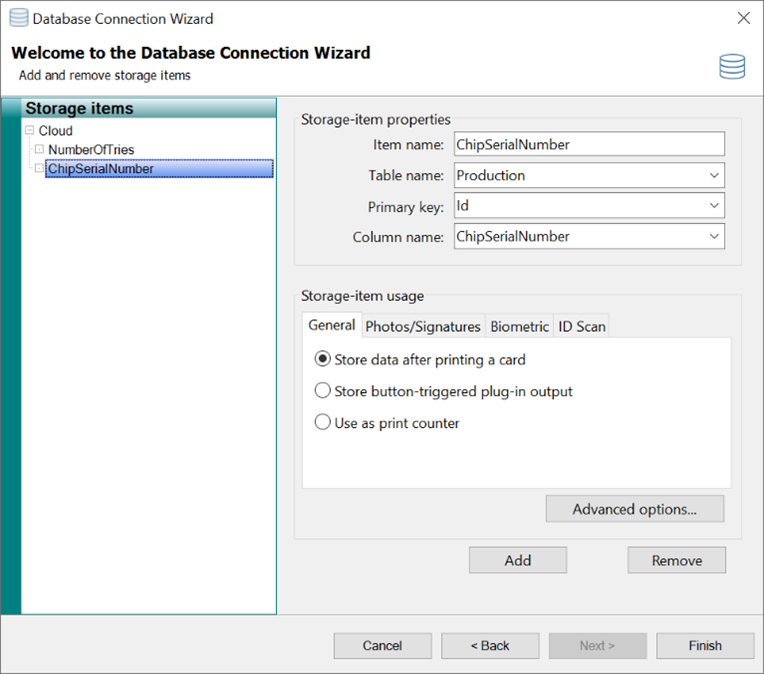
Storage Items:
There are a few storage items that will need to be configured to write back some information needed for CardExchange Cloud.
NumberOfTries: This is used as a print counter for the record’s credential. Set this to store a value back into the Production Table into the field NumberOfTries. This should always be stored back. If this value is missing, then the Credential will not move past the In Production stage.
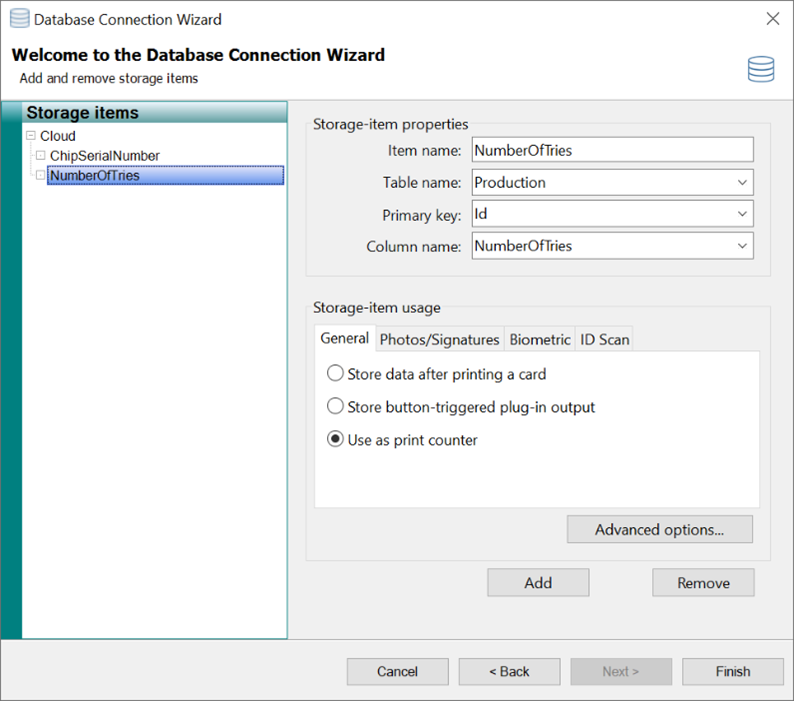
ChipSerialNumber: Even if you will not be reading a SMART card, you will still have to pass controller back a value for the ChipSerialNumber. Set this to store a value in the Production Table, under the field ChipSerialNumber. The card will not be able to be printed if this value is not stored.
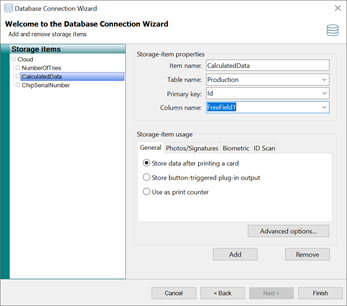
If you are calculating a value at time of print, and need to save that data back to cloud, you can do so by creating an additional Storage Item for that value.
When you have finished, click on the Finish button, and save your Database Definition File.
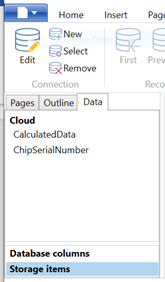
Mappings
After the Database Connection has been configured, you will need to configure the Mappings for your Storage Items.
Click on the Data tab in the left hand pane, and then click on Storage Items at the bottom. You will then see your storage items that need to be configured.
Click on the ChipSerialNumber, then in the Properties box on the right, set this to what you would like to store back. In Press, by default, it stores a Global Counter, with a prefix of C5, and formatting as an Integer with format code X12.
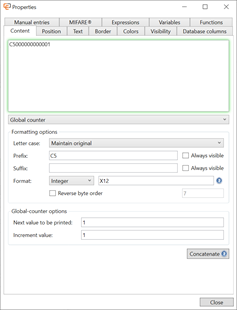
Alternatively, If you would like to read a SMART card at print, and store back the UID, you will need to configure the correct read operation, such as MIFARE Classic, then select MIFARE® Classic UID from the dropdown.

If you have any additional Storage Items to configure, do so now. For an example, I have a CalculatedData field that I will be saving.

Now you can finish the Card Design, then save and close.


ISO/IEC 27001:2013